
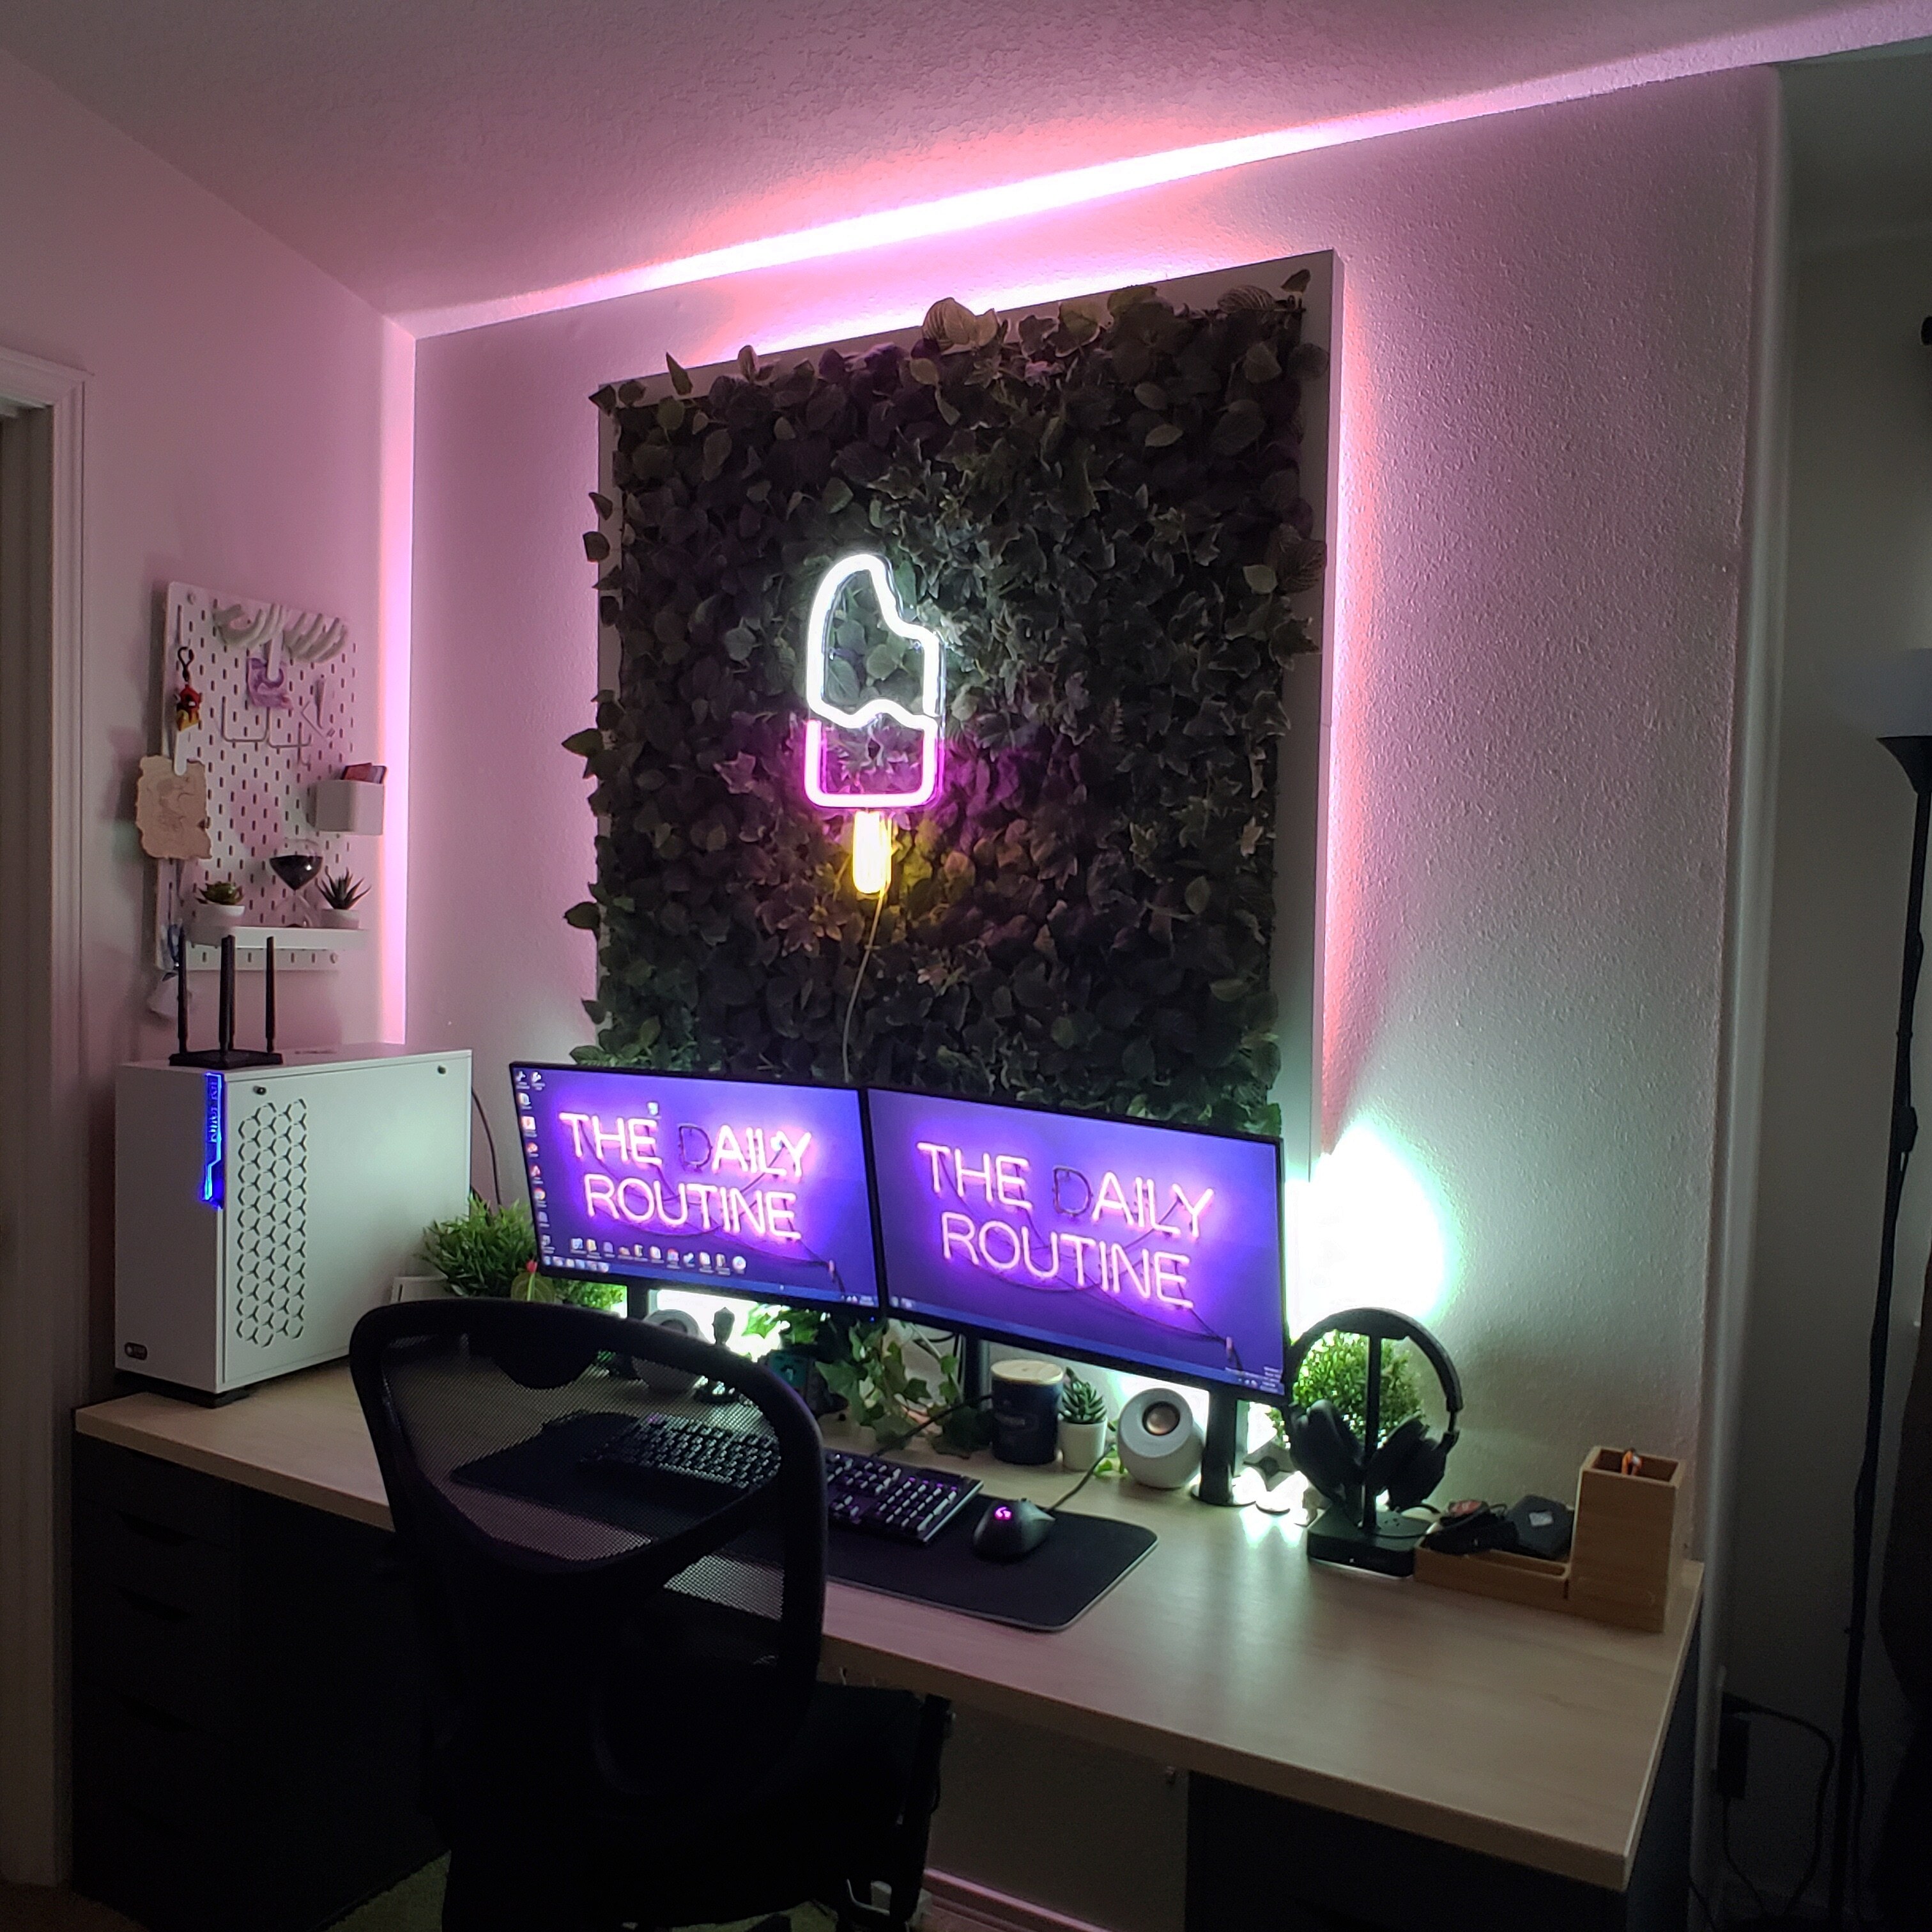
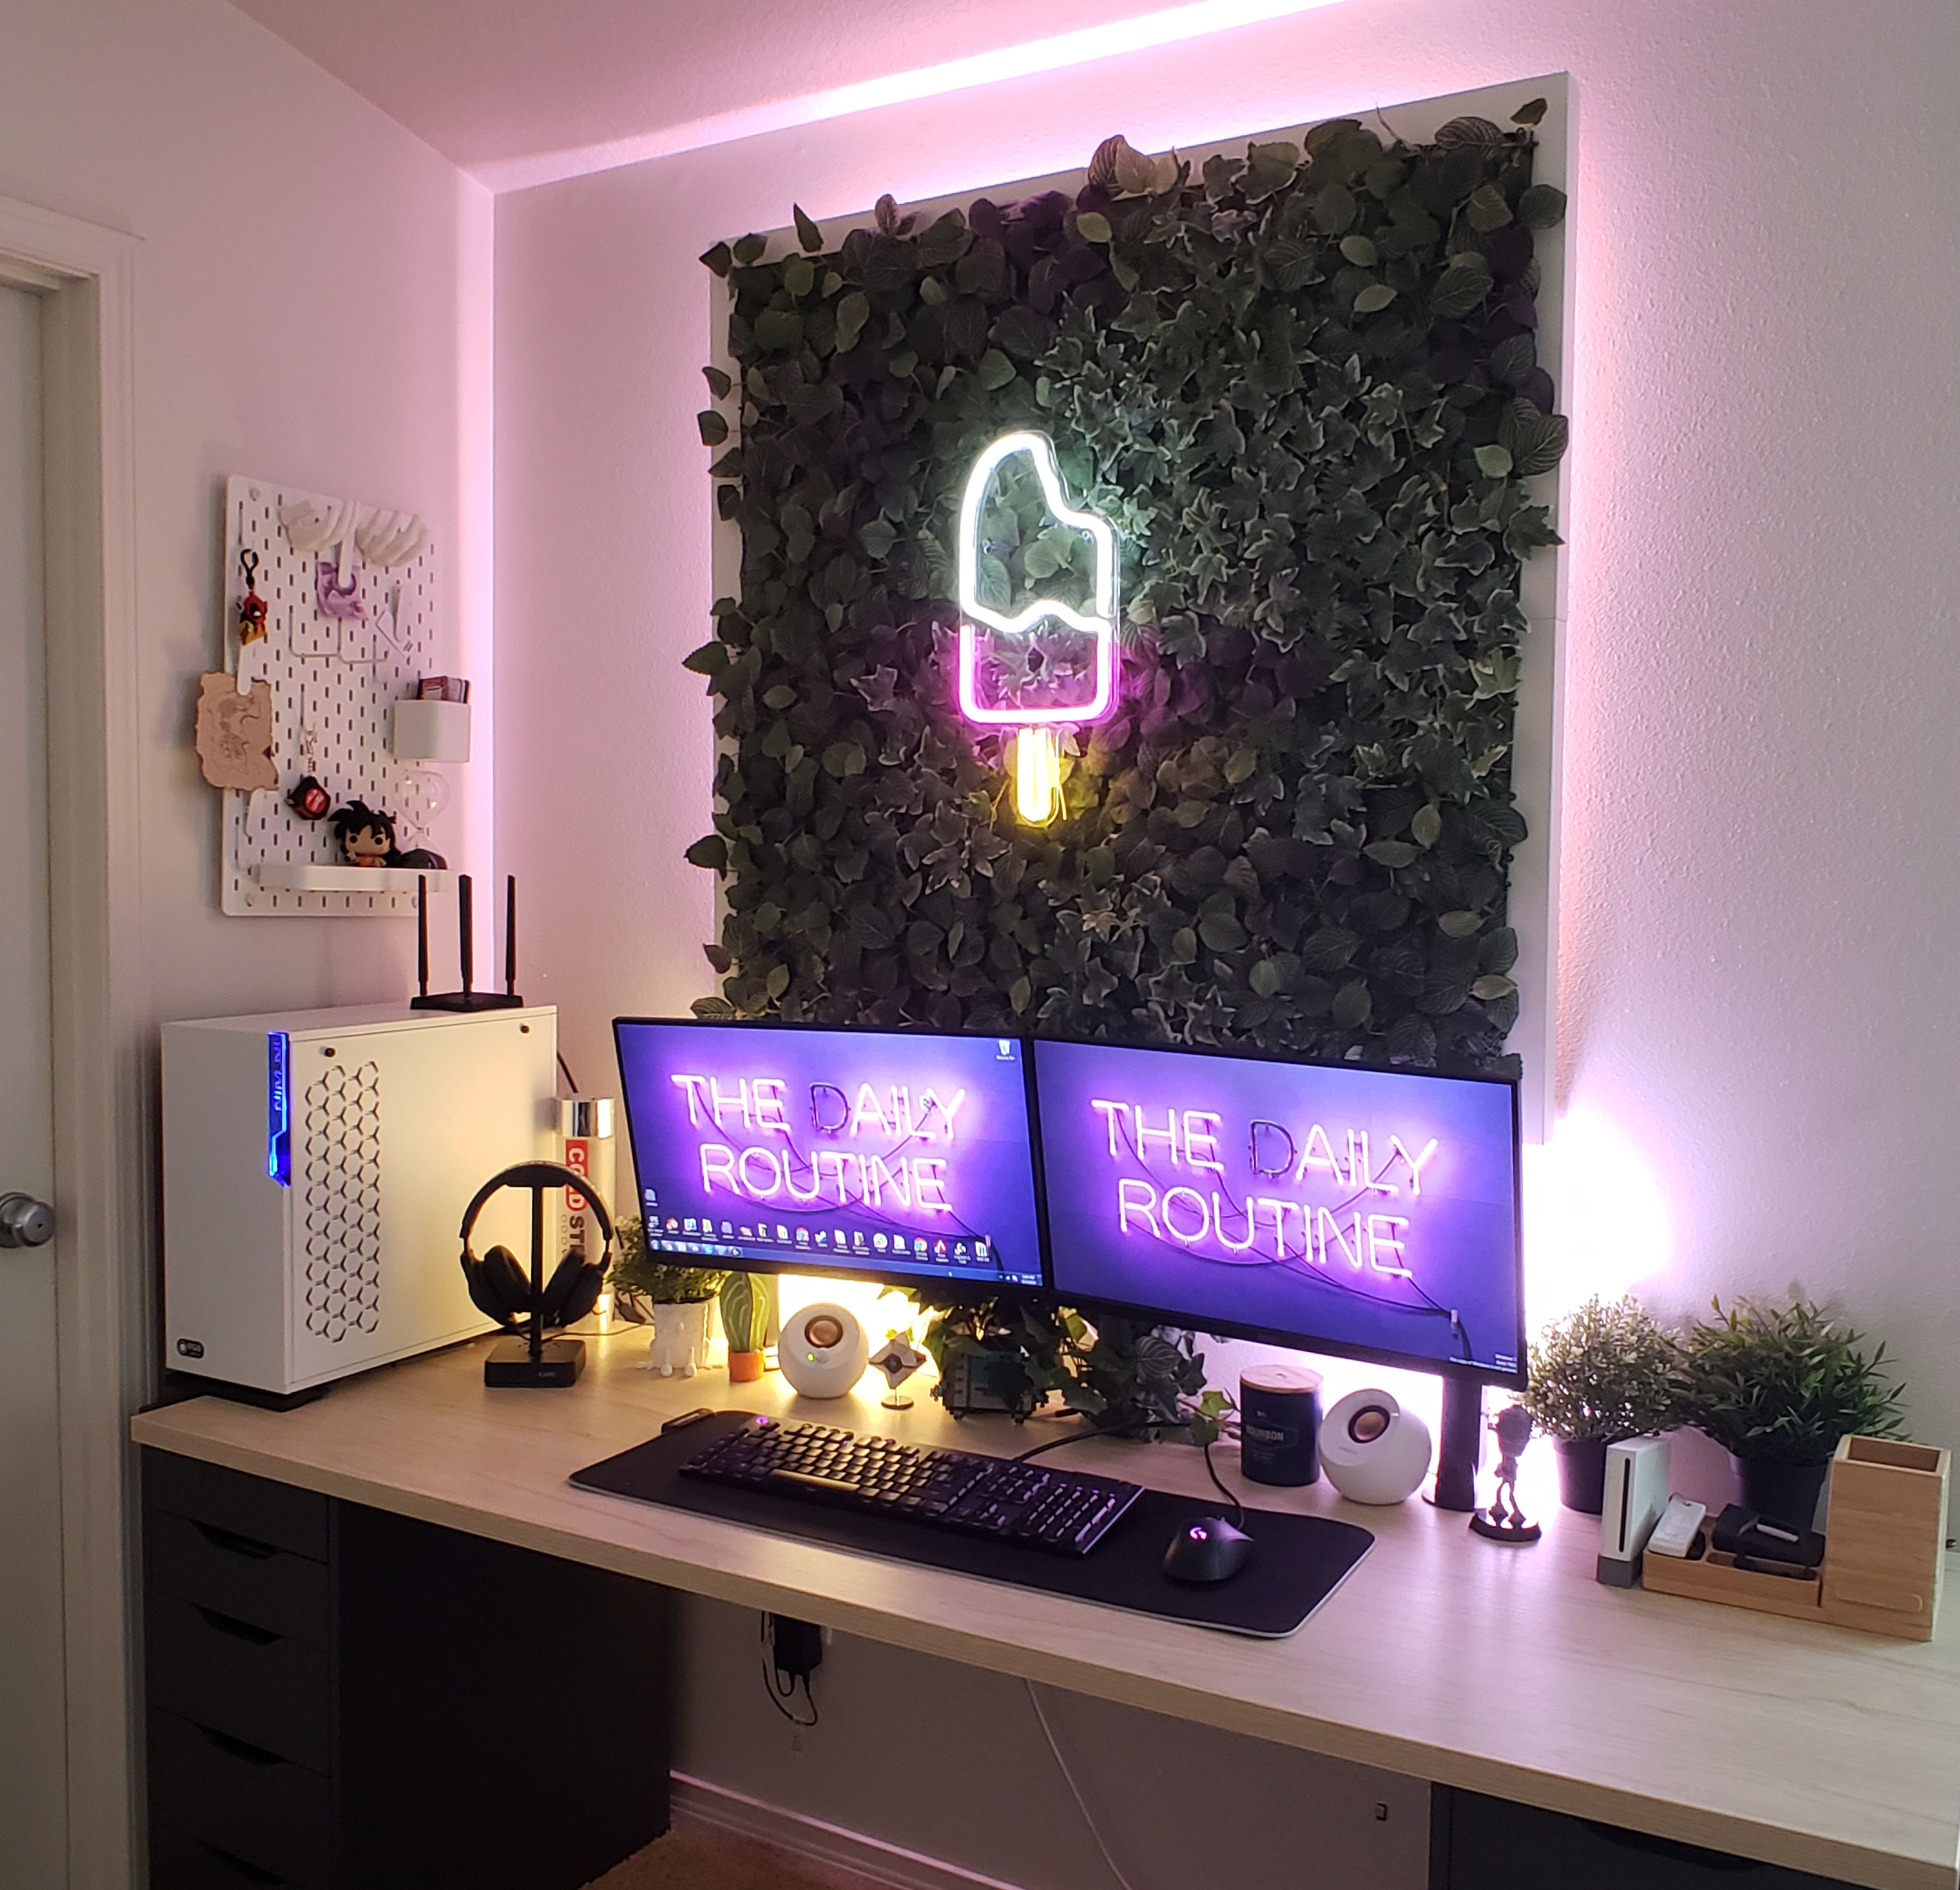
Stuck at home during the pandemic, I decided to work on upgrading my battle station. I hated looking at a white wall all day and have always loved the mix of greenery and LEDs. Here is my cheap Ikea hack to achieve a floating living wall light fixture.
ITEMS USED FOR DIY LIVING WALL
Ikea specific items
4x Ikea White Lacke Tables ($40)
16x Ikea FEJKA Plant Panels ($80)
All other items
1x Popsicle’ LED Neon Signs ($29)
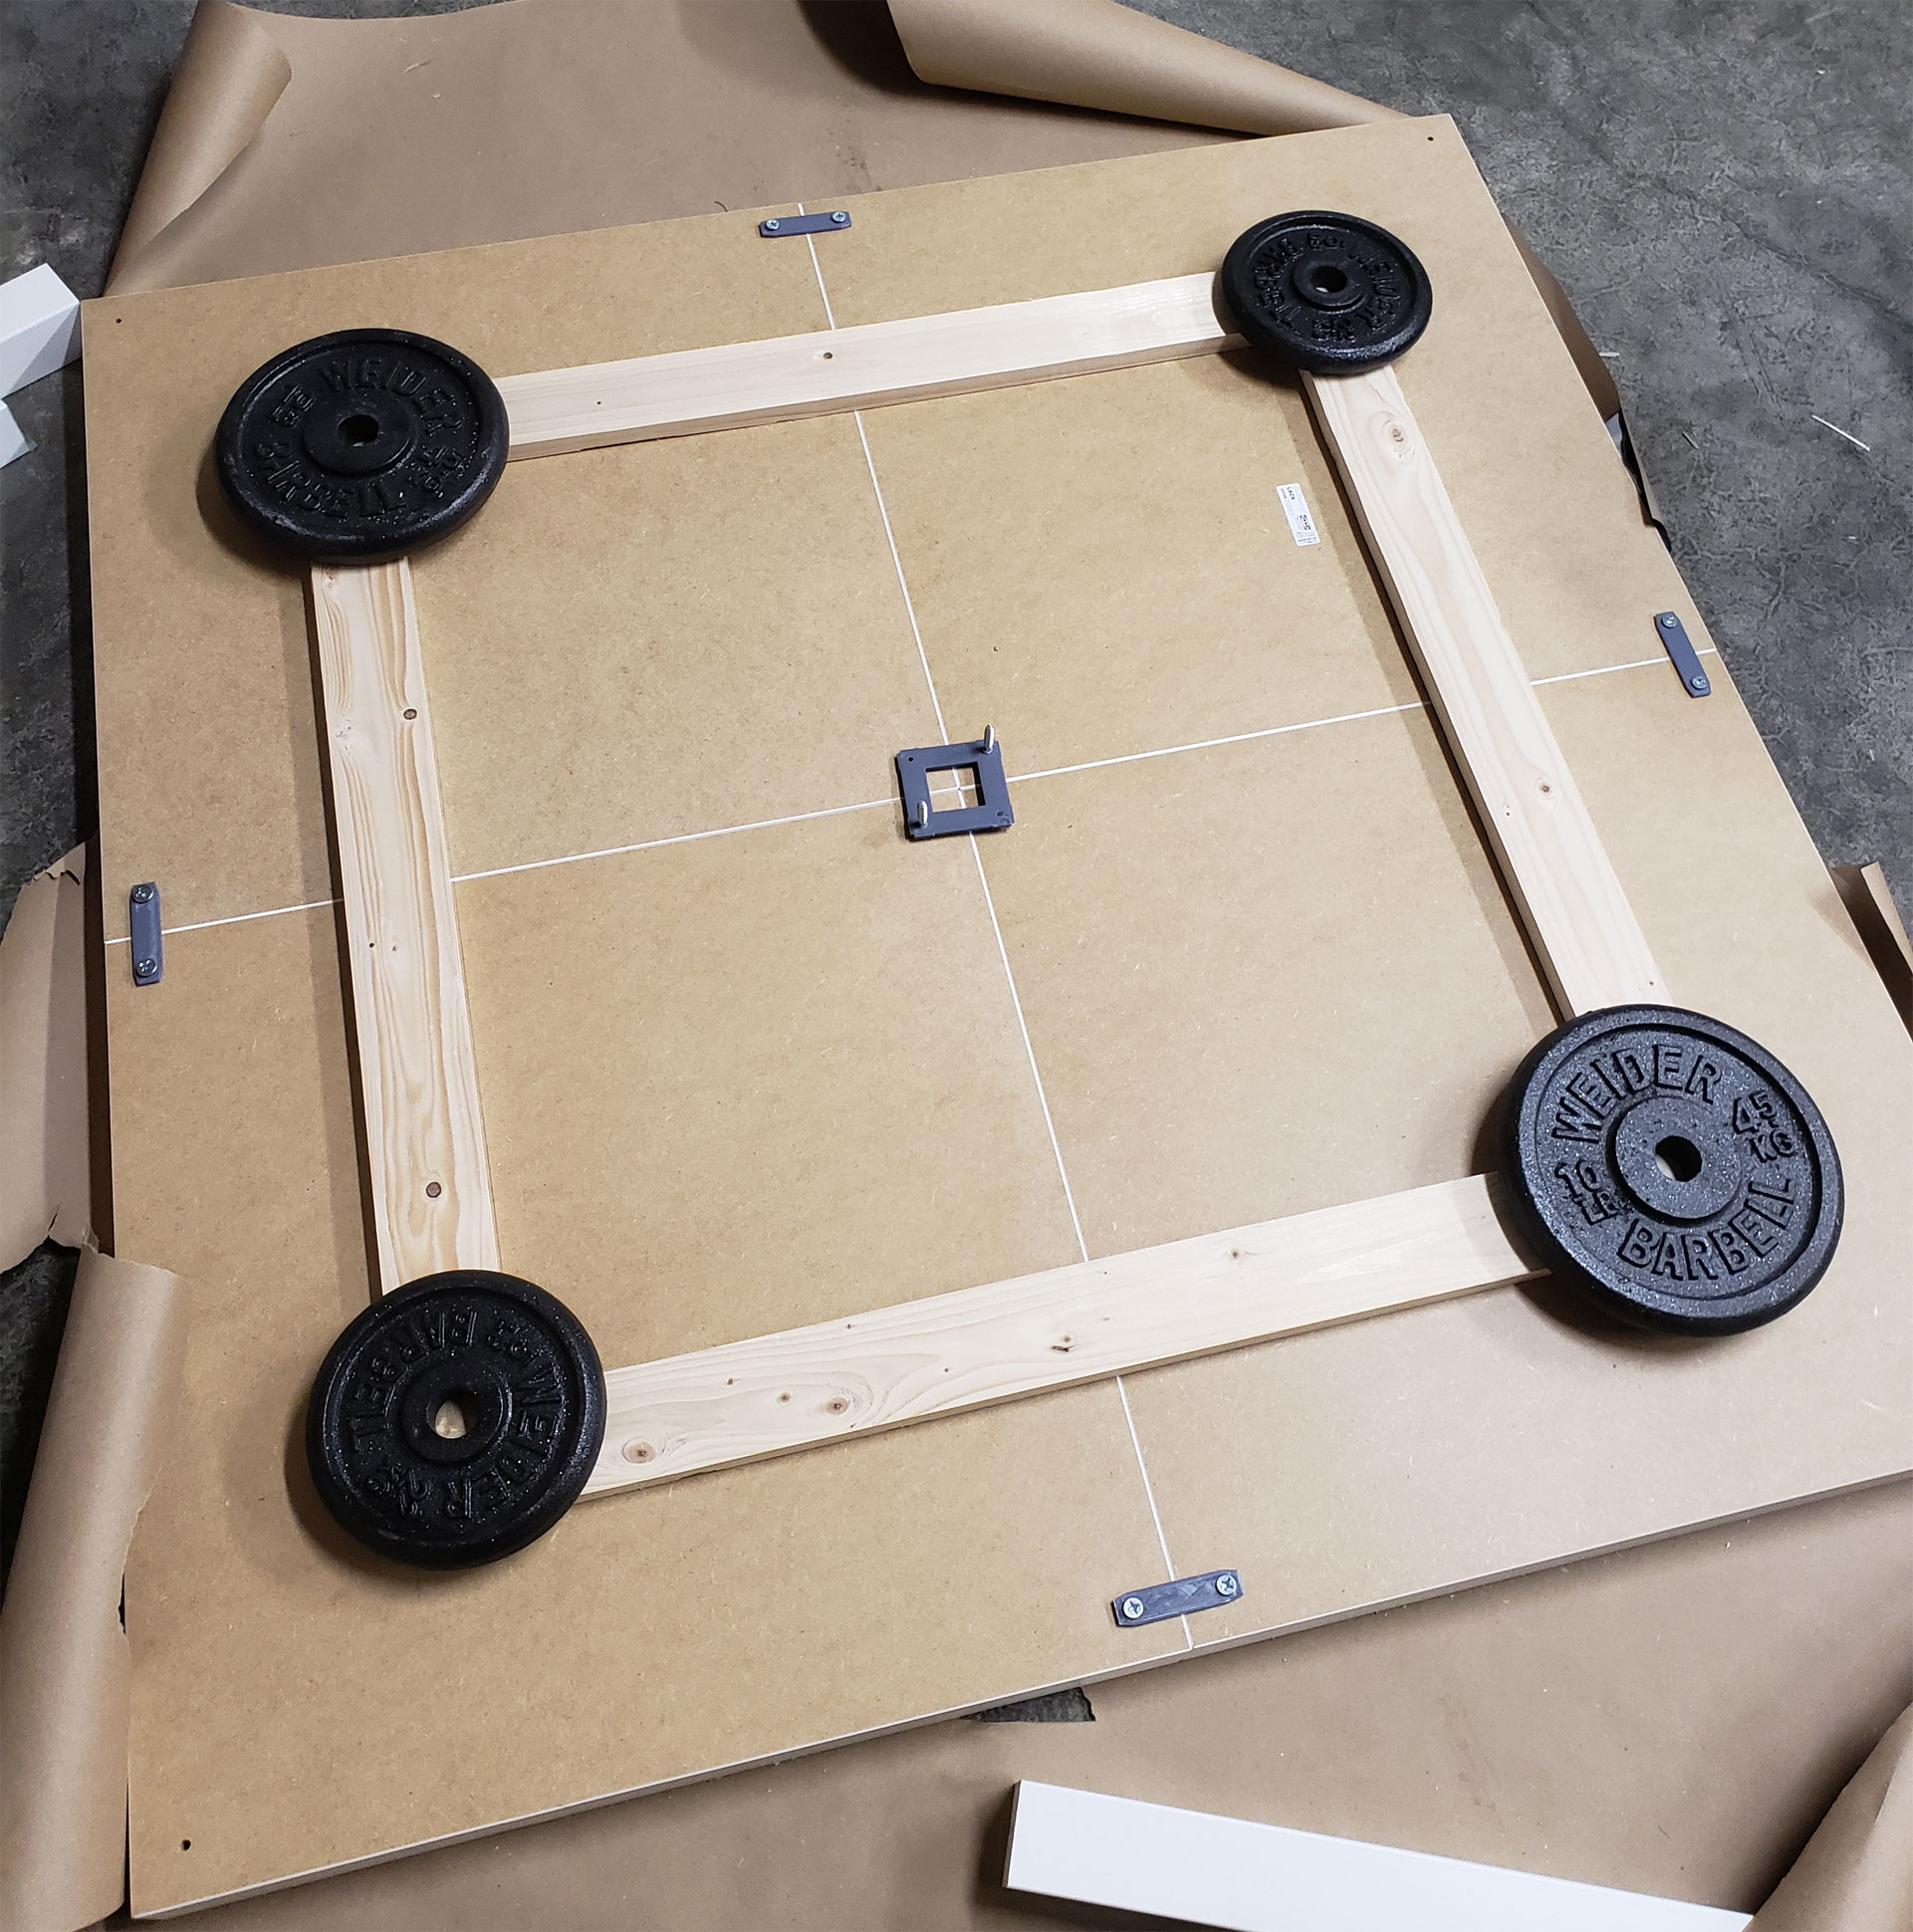
2x Furring Strip 3×1 ($4)
1x Loctite PL Premium Construction Adhesive ($6)
2x Eria Flexible Extended Colors LED Strip ($100)
1x French Cleat Hanging Bracket ($11)
Living wall concept
living walls. Green walls. Vertical gardens. Living walls are always something you see in lobbies of hotels and corporate buildings. They are great at creating contrast in a room and providing depth and texture to otherwise empty walls. I have always loved these and taking it a step further by contrasting greenery with neon lighting has always been appealing. So I set out on a mission to create living wall fixture for behind my desk to help bring life to an otherwise boring wall and to assist with lighting.

The Greenery: Ikea FEJKA Panels
What made this idea seem way more possible is coming across the FEJKA panels Ikea sells. These panels are $4.99 and come in 10×10 squares that all connect, they are light, flexible, and come in 2 primary styles. I purchased 16 of these to make a 4×4 block measuring 40×40.
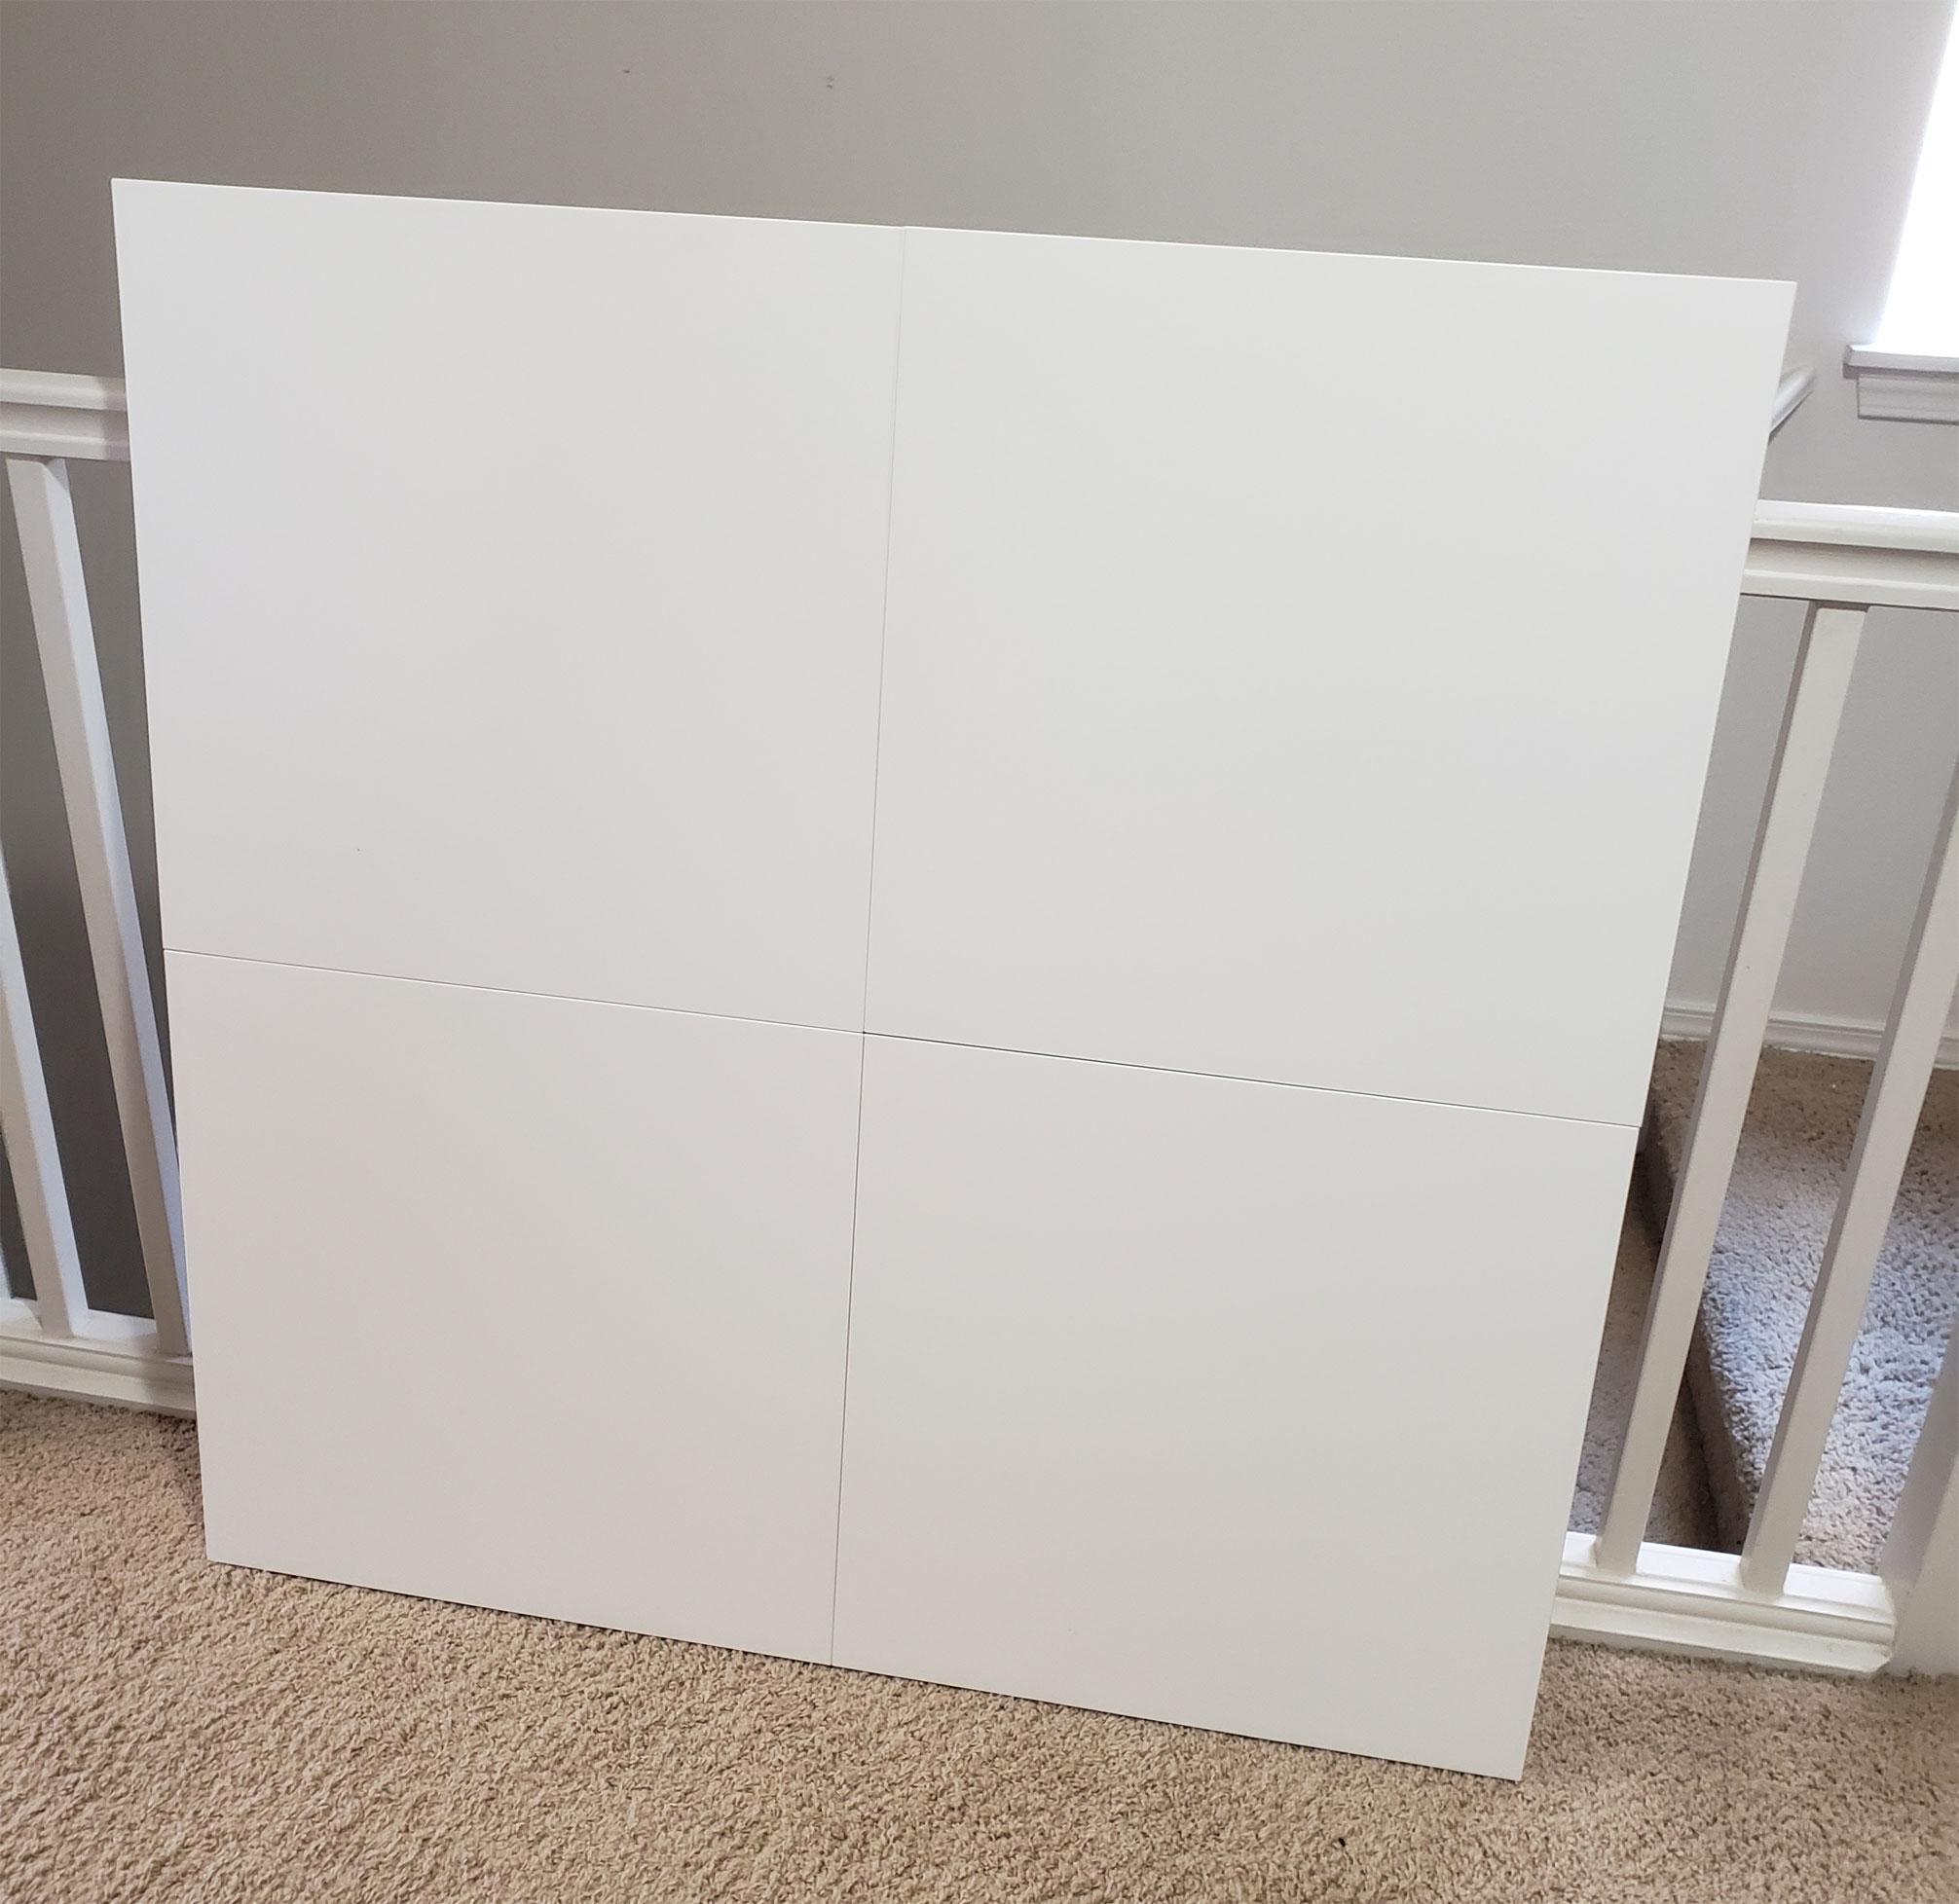
The Paneling: 4 Lack tables smashed together
After getting FEJKA panels I needed a way to frame everything, I had considered an actual frame but the sizing would have been difficult and I wanted backlighting and for the entire fixture to come off the wall to give it more depth. Lack tables are perfect for this, a few factors went into my decision to use these
- Weight: the tables are insanely light for the dimensions you get out of them. Putting together a similar size piece of wood with 2 inches of depth would be costly and likely heavier than 4 Lack tables.
- White Finish: The other big factor was getting a nice white finish without dealing with painting and prepping a piece of wood.
- Cost: At $10 a table you cant beat the value of these. While the white tables list as $14.99 on Ikea.com they ended up being $10 in the store.
Connecting it all
After a lot of searching on Reddit and IkeaHackers.net my Roommate recommended I connect everything with Construction Adhesive. The original plan was to use Wood Glue and Im thankful I did not go that route after learning about the power of Construction Adhesive.
I connected 4 cut 3×1 furring strips together with some screws and wood glue to make sure the back frame was stable.
I connected the frame of furring strips with Loctite PL Premium construction adhesive to the Lack tables. This thing is solid and is not going anywhere. I also added a small sheet of plywood in the middle with construction adhesive as a “just in case” precaution.
Note: I attached each Lack table to each other with 3d printed brackets utilizing the existing holes with some similar screws. I absolutely do not think this was necessary though.
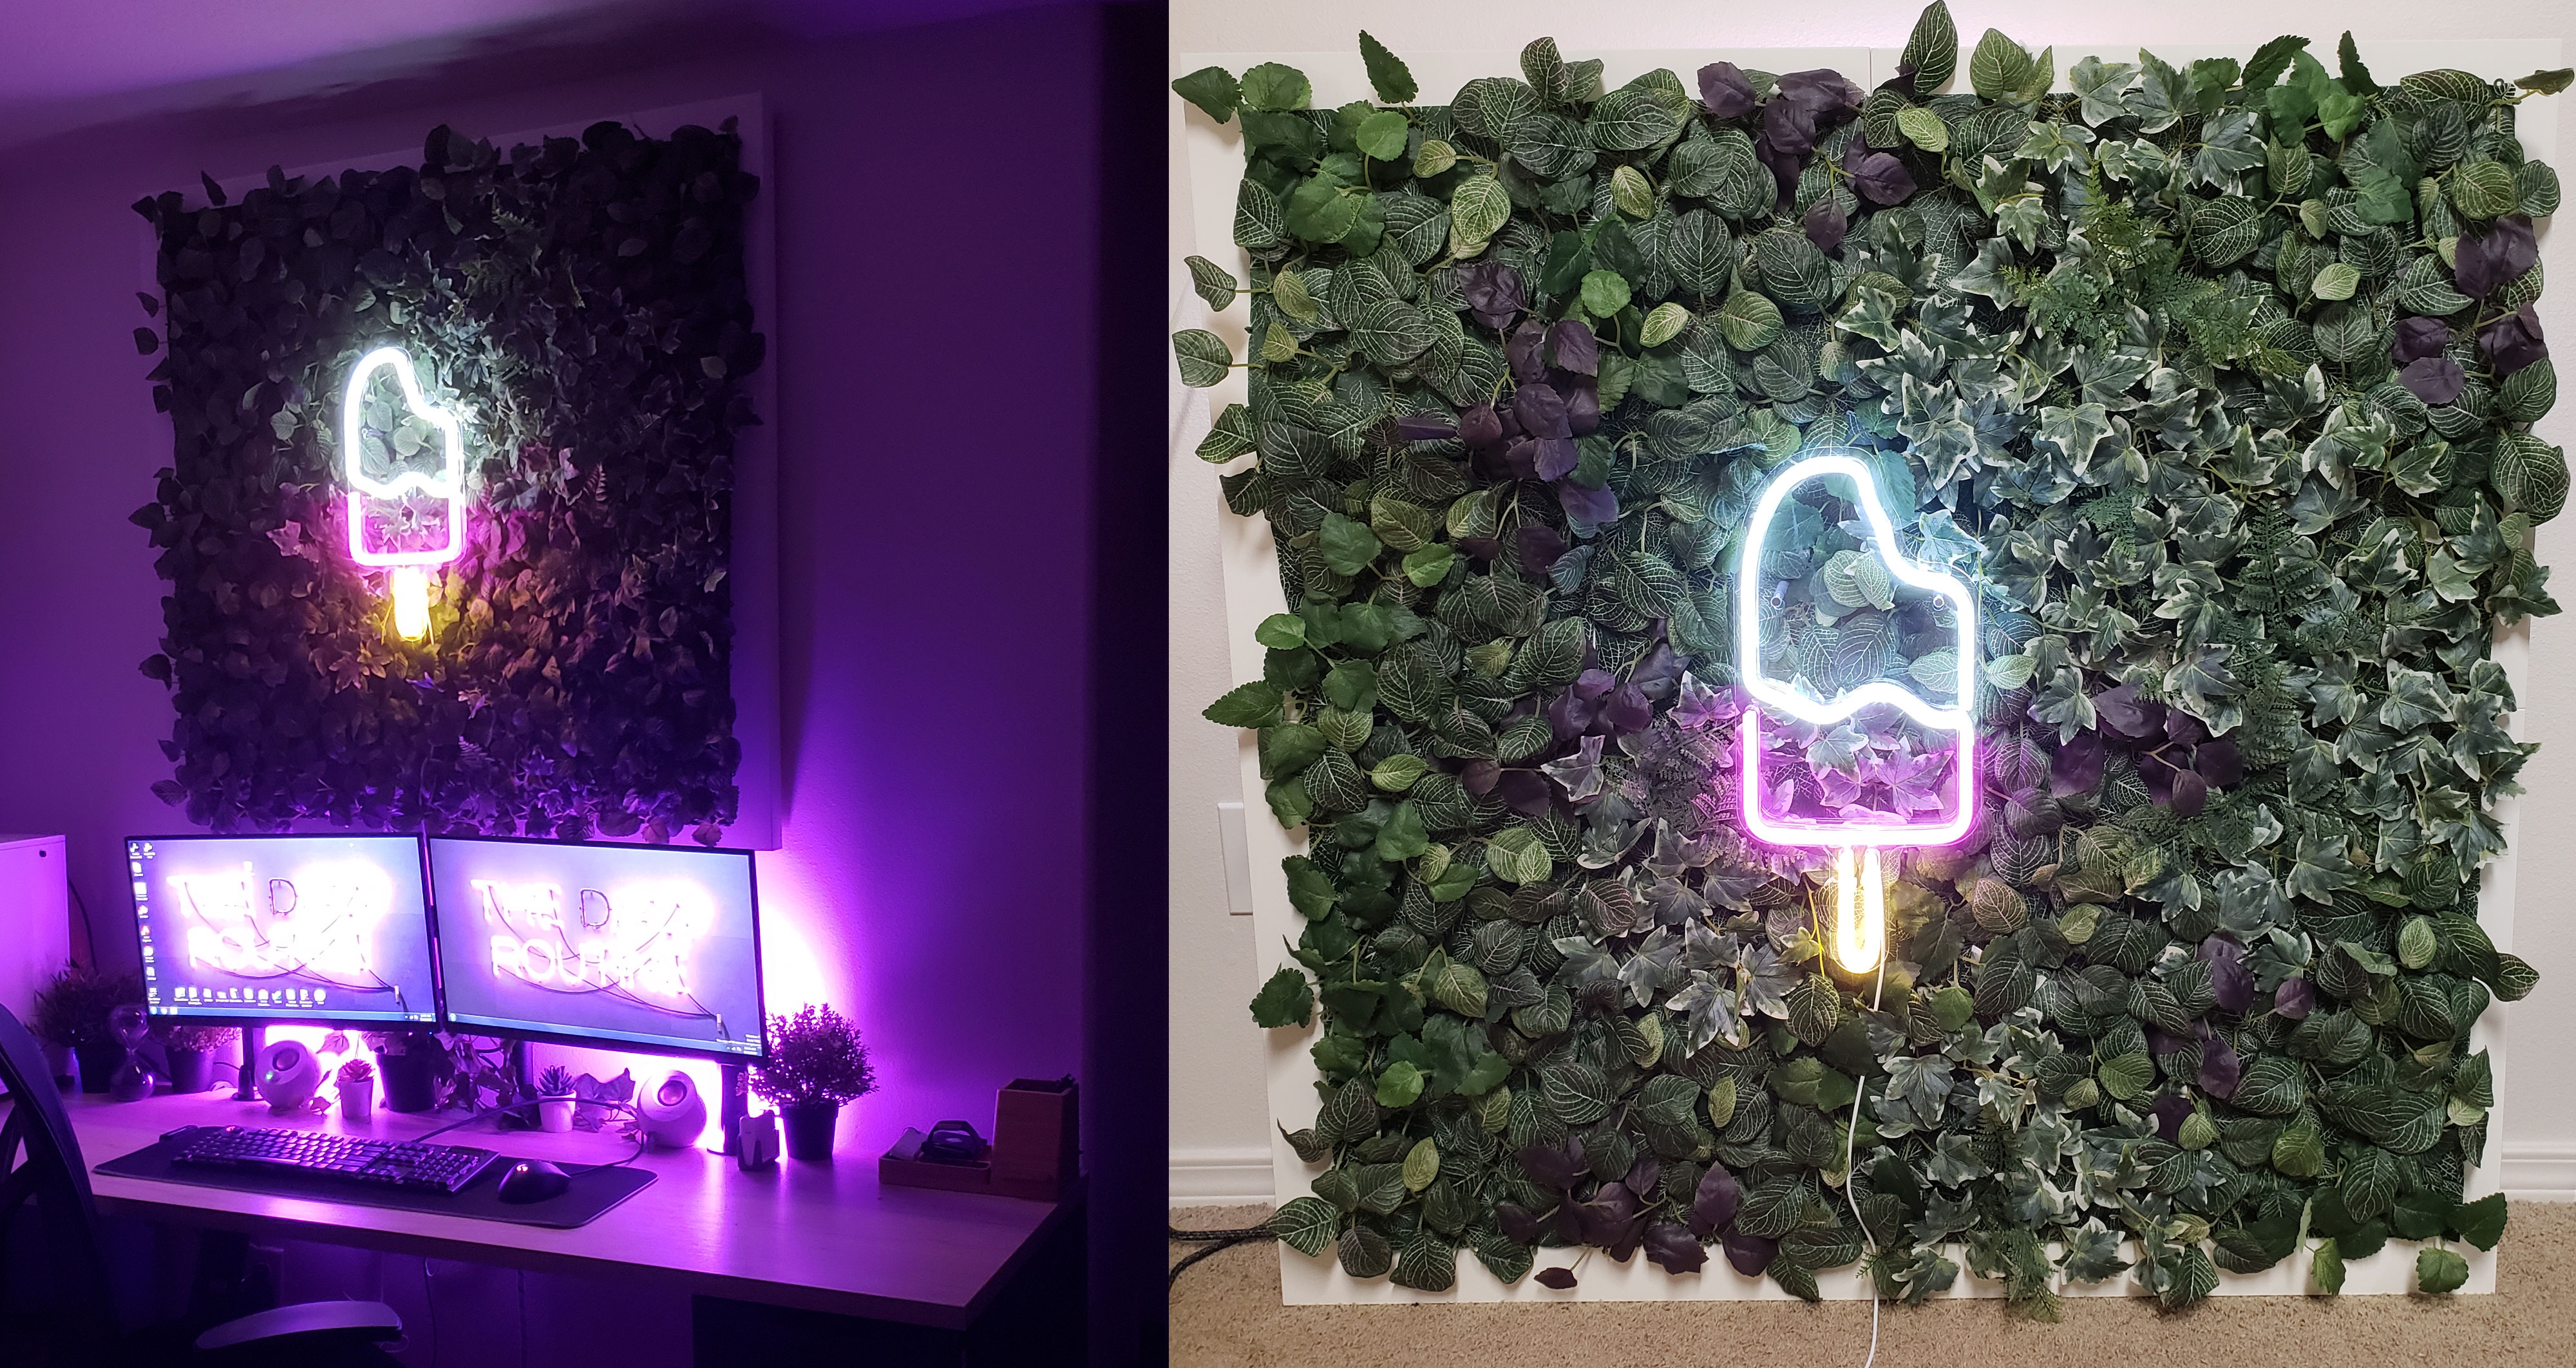
Adding the greenery & Neon Sign
This is the only part that gets tricky, and each person would need to figure out what works best for them. For the Ikea FEJKA panels I 3d 4 small hooks that I used double-sided sticky table on to hang the paneling from the top. This could easily be done with JUST double-sided sticky table or some kind of smaller misc hooks from home depot. Mounting the popsicle neon sign is a little more complex since you need it to pop out from the wall 2-3 inches. I 3d printed standoffs for this and used double-sided tape to mount the stand offs. I imagine you could do something similar with wooden dowels glued to a thin strip of wood as a workaround for this. The neon sign is only about 2 pounds so it’s pretty easy to mount with just 3M tape.
Backlighting and mounting
It was important for me that this serves as a good source of light since I planned on it being behind my work station. I did a lot of research and ended up using 2 boxes of Eria Flexible Colors LED, these synced with my Hue hub nicely and other lights in my room and were not as pricey as the Phillips Hue Light Strip. I used the 3m tape attached to these and routed it along the 3×1 frame on the back. Using a french cleat drilled into the back of the 3×1 to mount it all, the one I bought could support 75 pounds and I could avoid any pain points by trying to mount multiple points by going this route.